Document generation
Lumiare generates full business documents (project charters, scope descriptions, statements of work, proposals, requirements specifications, RFI and RFP responses, audit reports, project summaries) with each section grounded in project evidence, then lets the team edit them together and export.
Turn your project data into ready-to-use documents, such as proposals or reports.
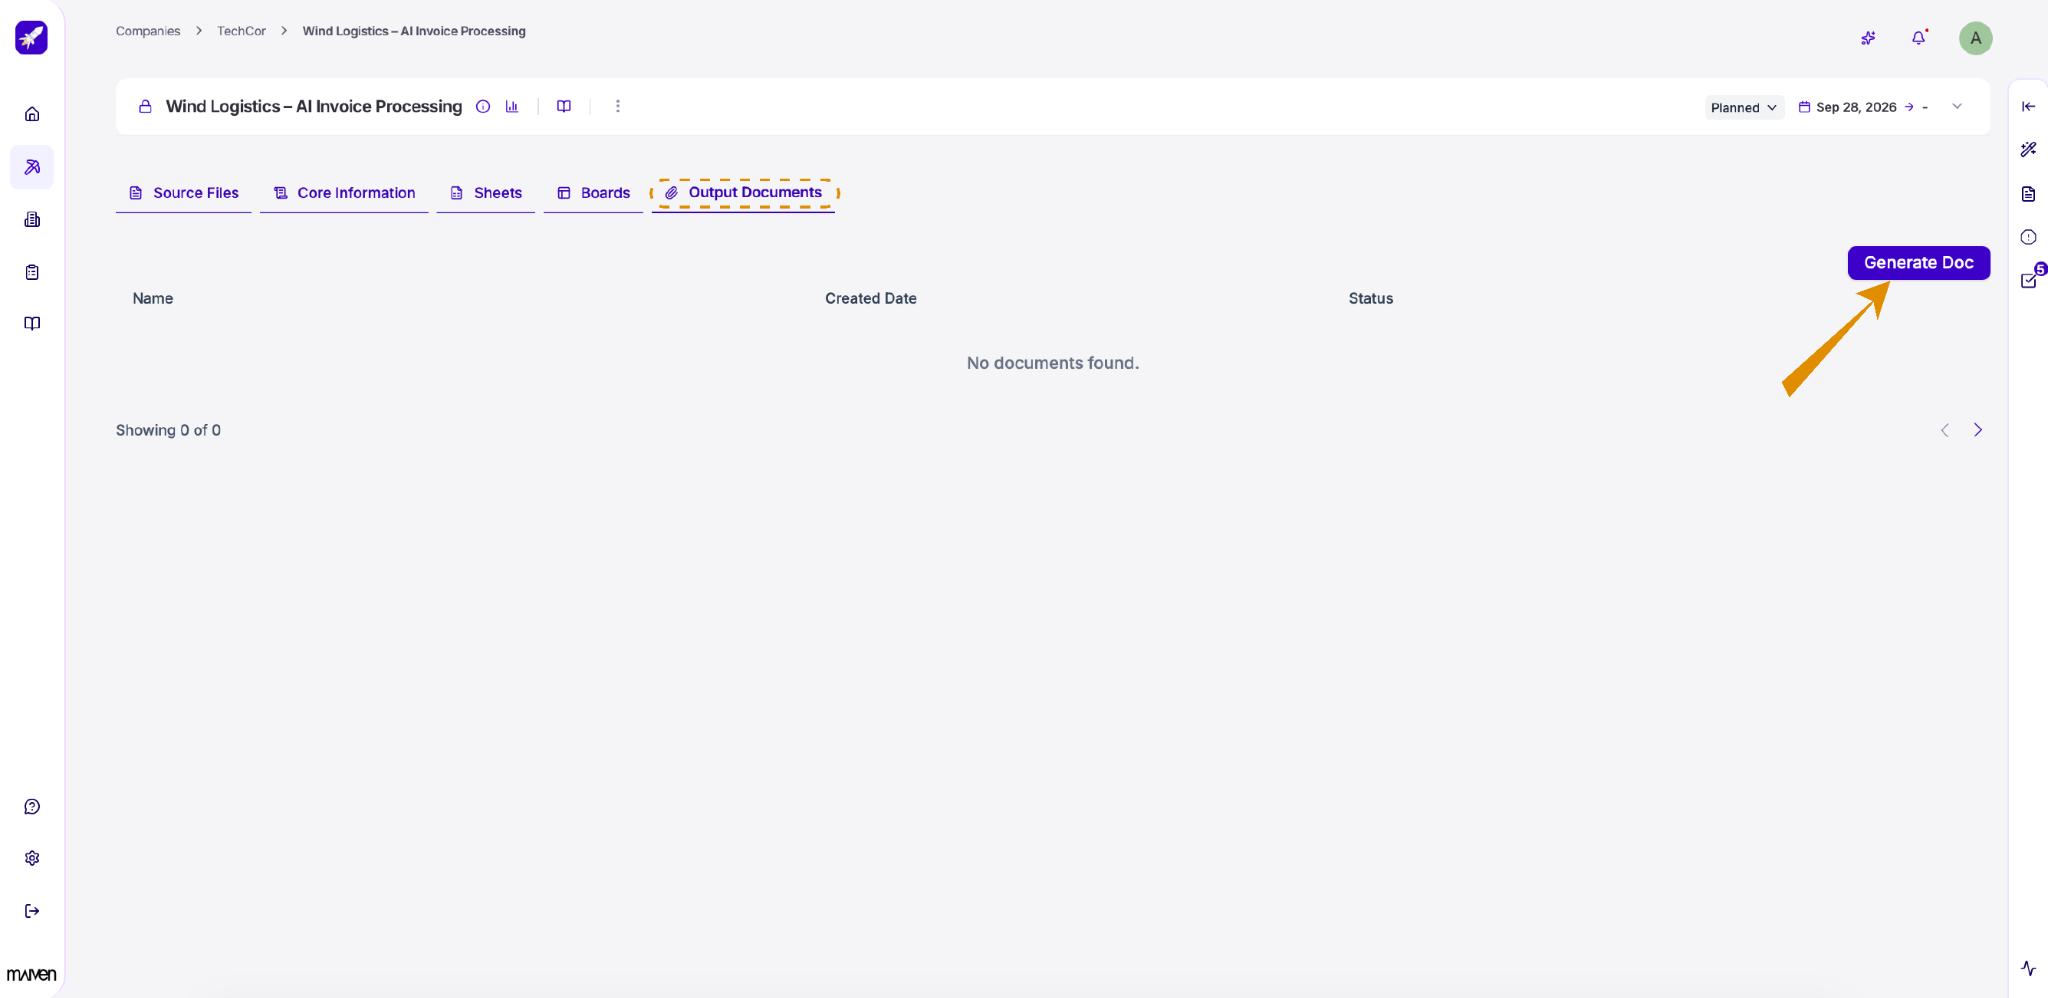
Open the Output Documents tab and click Generate Doc to get started.
All your generated documents are listed here, along with the date they were created and their current status.
Choose a starting structure
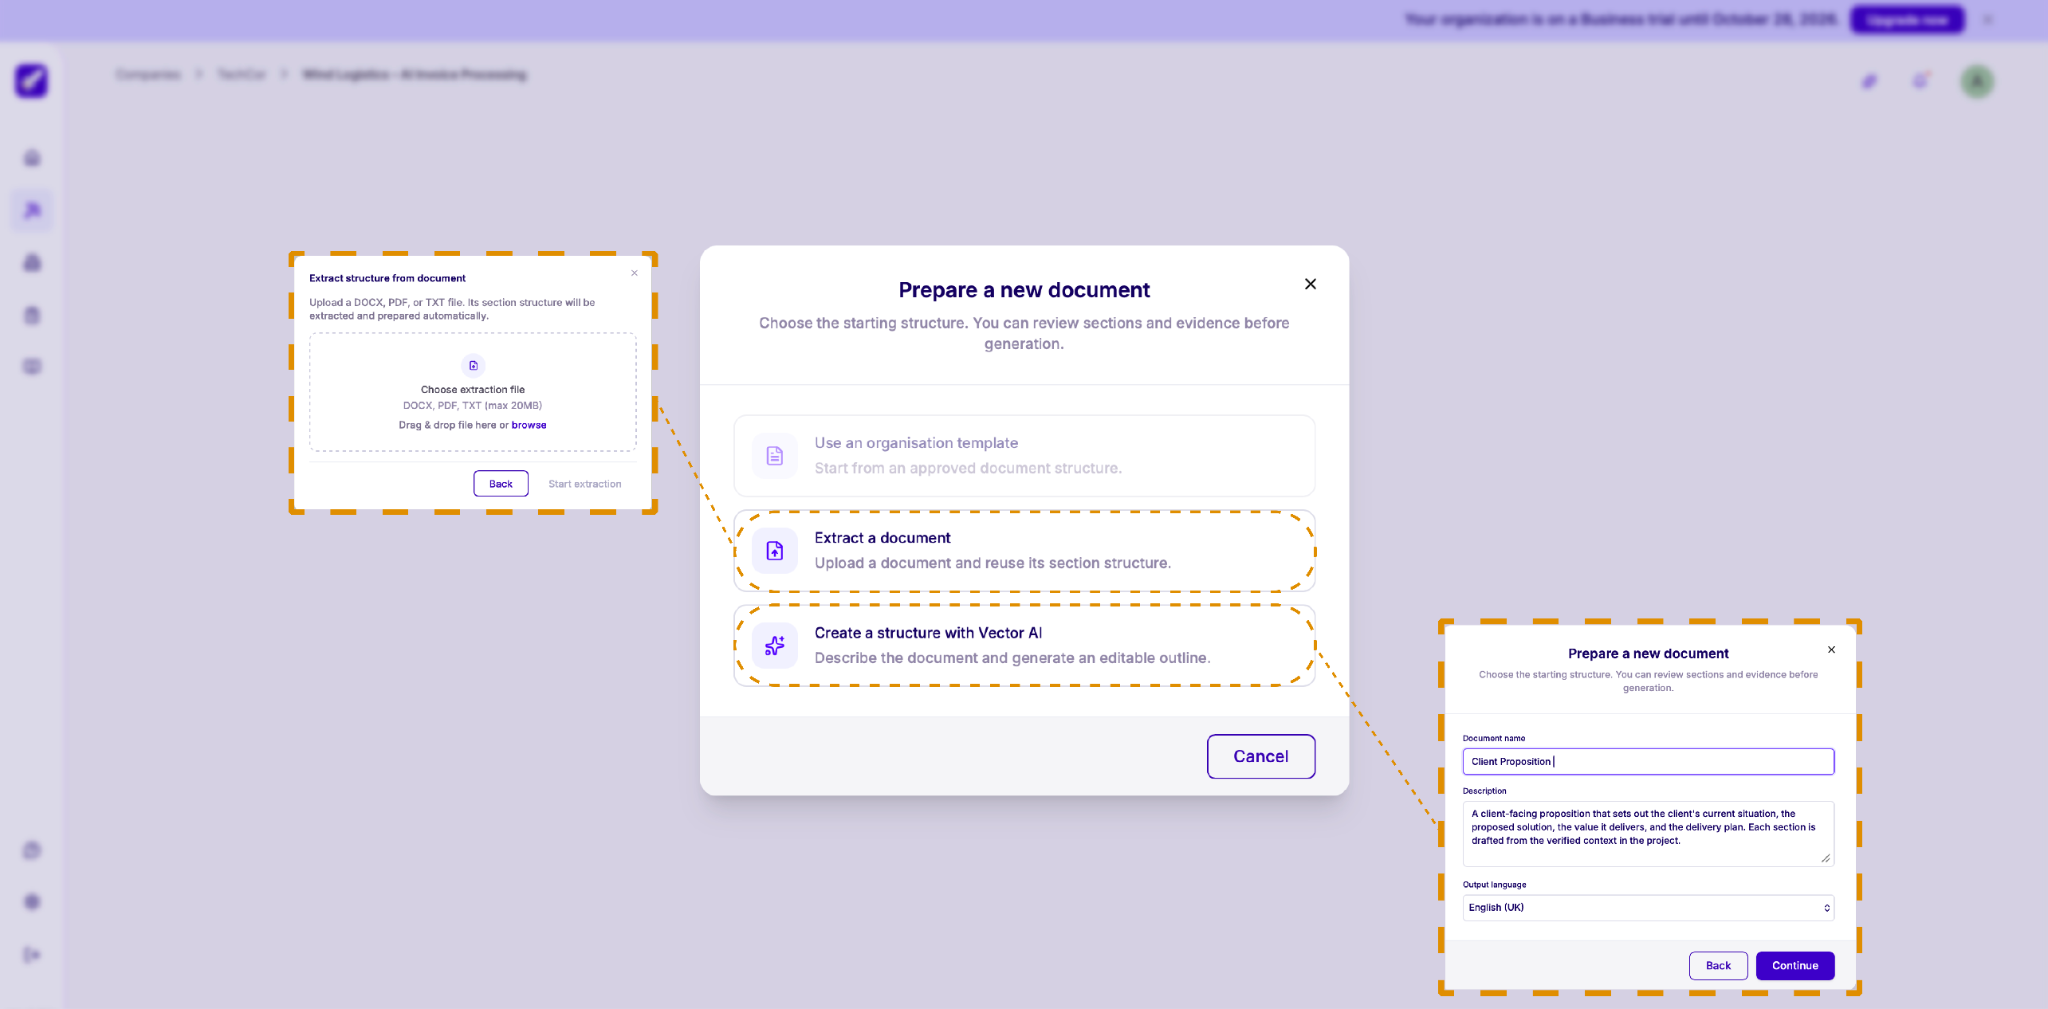
When you click Generate Doc, you'll be asked how to structure your new document. You can review the sections and supporting evidence before anything is generated.
-
Use an organisation template: Start from an approved document structure your organization has already set up. This option is available once your organization has published templates.
-
Extract a document: Upload an existing DOCX, PDF, or TXT file (up to 20 MB) by dragging and dropping it or clicking browse. Lumiare reuses its section structure for your new document. Click Start extraction to continue.
-
Create a structure with Vector AI: Enter a document name and a description of what the document should contain, then choose the output language. Click Continue, and Vector AI will generate an editable outline for you.
Prepare your document
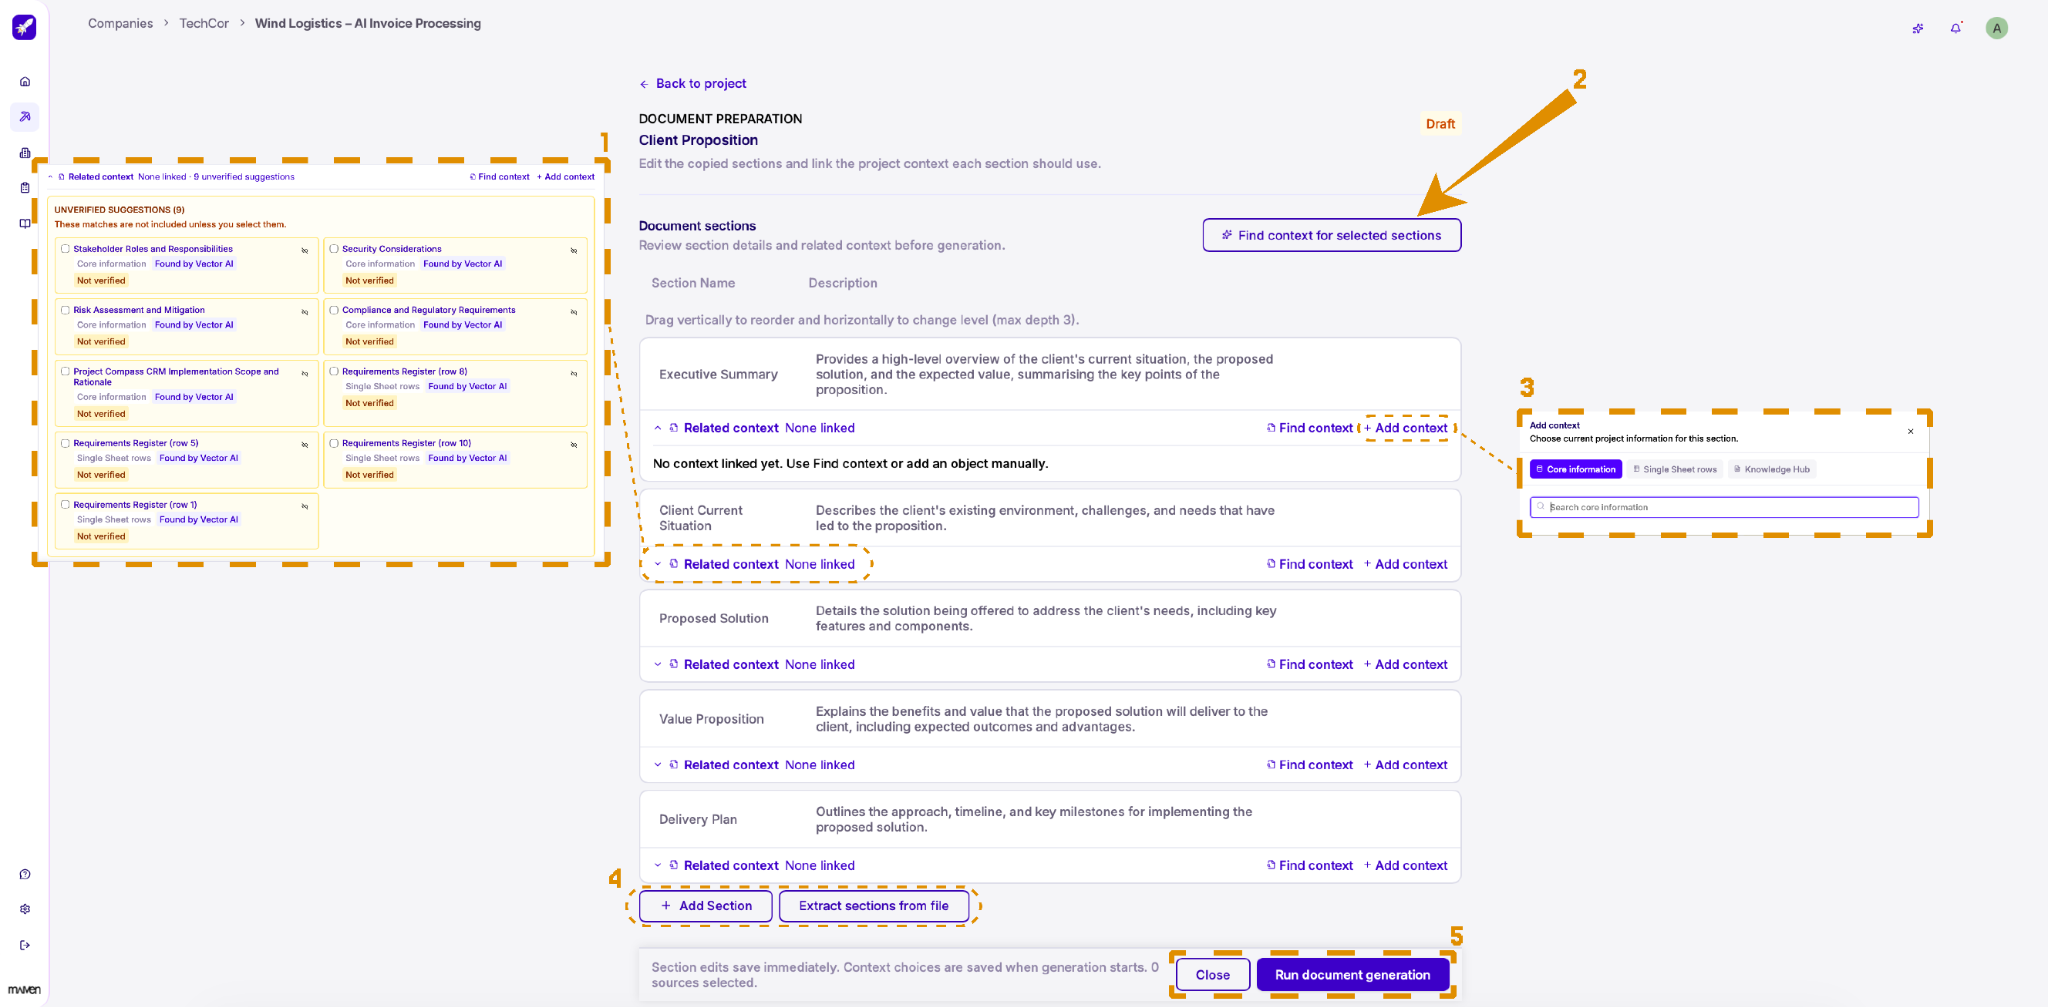
Before generating your document, review its sections and link the project information each section should draw from. Here's what each numbered area does:
-
Related context: Expand this under any section to see the context linked to it. When Vector AI finds possible matches, they appear as unverified suggestions. These aren't included unless you select them, so tick the ones you want to use.
-
Find context for selected sections: Let Vector AI search your project for relevant information across all selected sections at once. You can also click Find context under a single section.
-
Add context: Click + Add context under a section to link information manually. Choose from Core Information, Single Sheet rows, or Knowledge Hub, and use the search field to find what you need.
-
Add or extract sections: Click + Add Section to add a new section, or Extract sections from file to import sections from an existing document. To reorder sections, drag them up or down, or drag left and right to change their level (up to three levels deep).
-
Run document generation: When everything is ready, click Run document generation to create your document. Section edits are saved immediately, and your context choices are saved when generation starts; OR Click Close to leave and come back later.
Edit your document in Document Studio
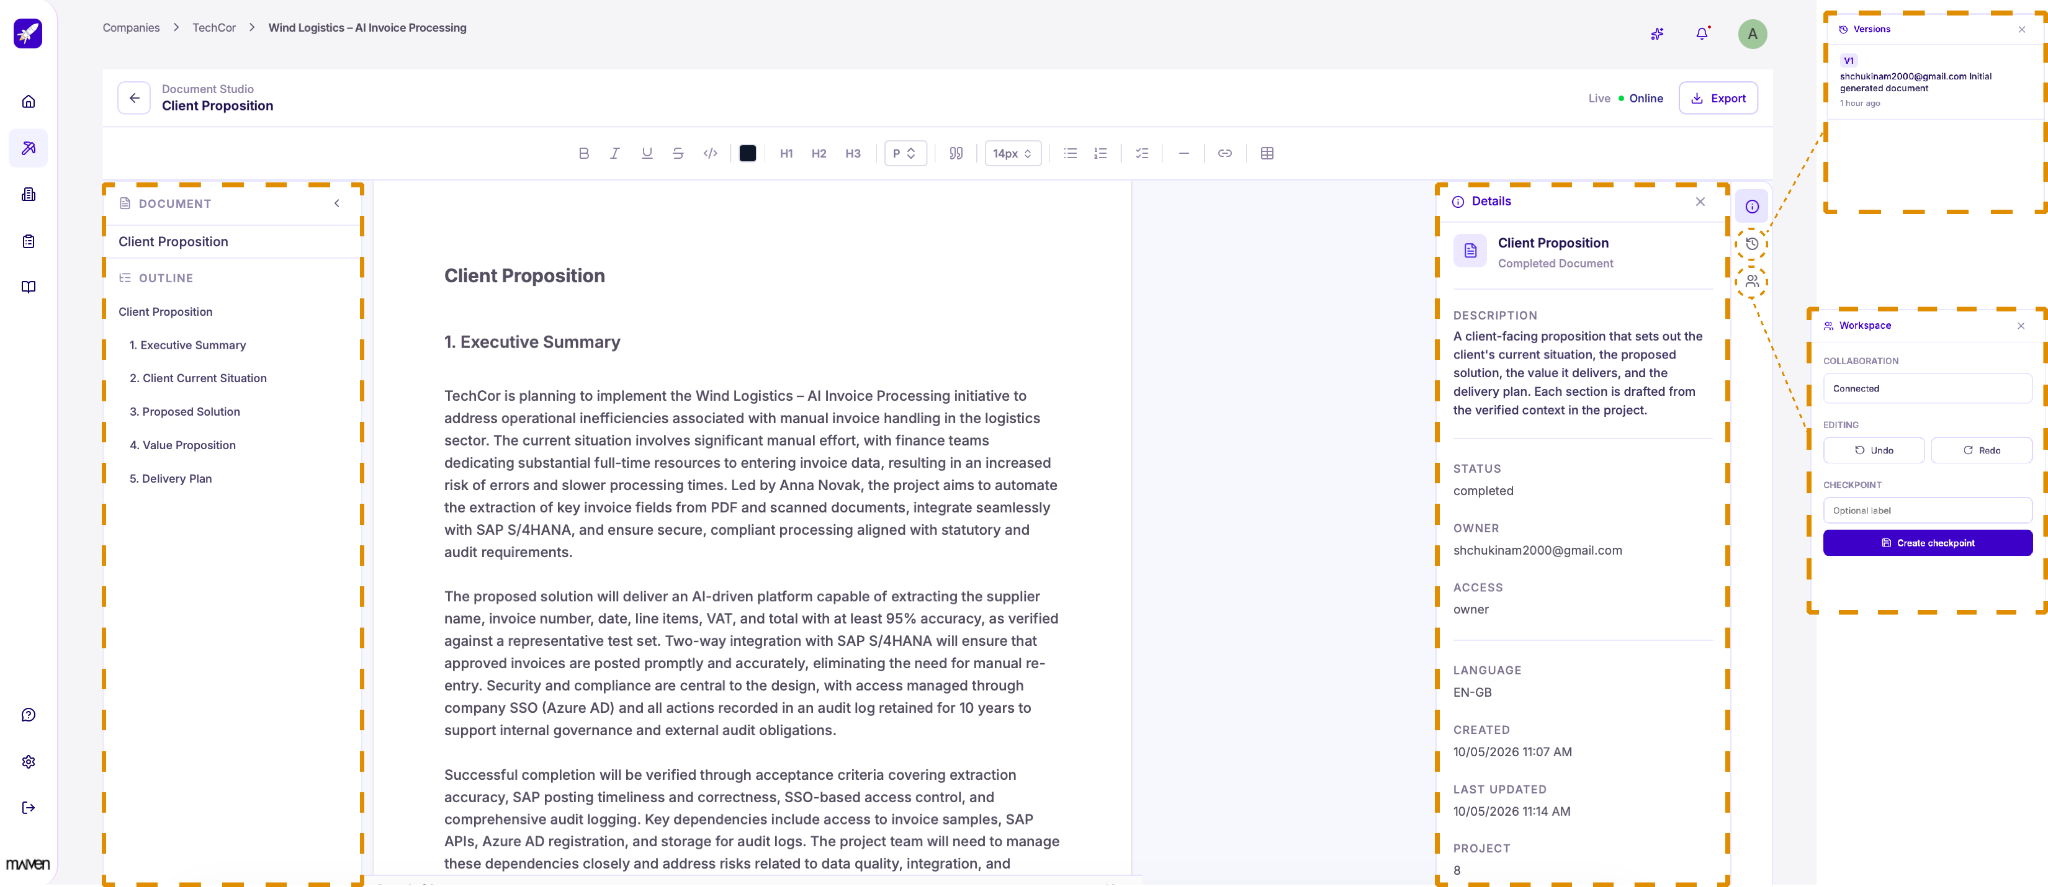
Once generation is complete, your document opens in Document Studio, where you can review and refine it.
Document and outline. The panel on the left shows the document's outline. Click any section to jump straight to it. You can collapse the panel to get more space for editing.
Editing. Click anywhere in the document to edit the text. Use the toolbar at the top to format text, add headings, lists, quotes, links, and tables.
Side panels. Use the icons on the right to open these panels:
-
Details: See the document's description, status, owner, access level, language, and creation and update dates.
-
Versions: Browse earlier versions of the document, including who made each change and when.
-
Workspace: Check your collaboration status, undo or redo changes, and create a checkpoint. Add an optional label so you can easily find that version later.
The Live indicator at the top shows that you're connected and changes are saved in real time. When your document is ready, click Export to download it.